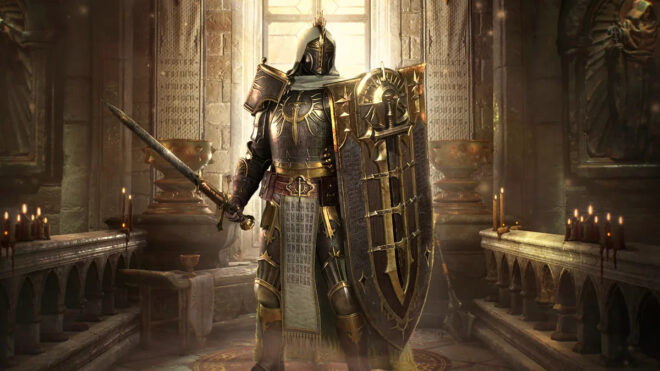
Diablo 4 Season 14 Guide: Release Preparation, Best Builds, and Leveling Tips

A new season in Diablo IV always brings a fresh start, new challenges, updated builds, and a completely different progression experience. For players preparing for Diablo 4 Season 14, understanding what carries over, what resets, which classes perform well, and how to prepare before launch can make the early game much smoother.

Season launches are not only about rushing to the endgame. They are also about experimenting with new mechanics, improving previous strategies, and enjoying the journey through Sanctuary.

Whether you plan to play for a few days or stay active throughout the entire season, the most important thing is to enjoy the experience.

Diablo 4 Season 14 Character Reset: What Carries Over?

One of the biggest questions before every new season is: What happens to my previous characters and items?

When moving from one seasonal journey to another, players should understand that seasonal progression starts fresh. Your seasonal characters, progression systems, and most resources will not transfer directly into the new season.

However, previous seasonal characters will automatically move to the Eternal Realm after the season ends.

Seasonal Transfer Summary

CategoryTransfers to New Season?Details
Character Level❌ NoNew seasonal characters start from the beginning
Skill Points❌ NoMust be earned again
Paragon Points❌ NoSeasonal progression resets
Gold❌ NoStarts fresh in the new season
Materials❌ NoSeasonal crafting resources reset
Runes / Special Resources❌ NoMust be collected again
Cosmetics✅ YesAccount-based cosmetics remain available
Clan Membership✅ YesRemains connected
Major City Waypoints✅ YesSome exploration progress carries over
Fog of War✅ YesMap discovery remains available

The seasonal reset may seem intimidating at first, but many players find that rebuilding a character from zero is one of the most enjoyable parts of Diablo 4. Each season gives players the opportunity to test new strategies, optimize builds, and progress faster using knowledge from previous runs.

Eternal Realm Item Transfer Explained

After a season ends, your previous seasonal character moves into the Eternal Realm. Your Diablo 4 gold, items, materials, and experience will be transferred there.

Players will also receive a special stash tab containing items from the previous season.

Eternal Realm TransferStatus
GoldTransferred
ExperienceTransferred
MaterialsTransferred
Legendary GearTransferred
Unique ItemsTransferred
Crafting ResourcesTransferred

However, players need to check this stash before the transfer deadline. Any items left inside the temporary stash tab after the season transition may be removed.

For players who actively maintain Eternal Realm characters, this step is important because valuable equipment and resources can disappear if they are ignored.

Choosing Your Diablo 4 Season 14 Starting Class

Your first seasonal character choice matters because early progression speed depends heavily on your build.

With changes affecting unique items, affixes, and gearing systems, players should select a class that can efficiently farm equipment and materials.

Recommended Starting Class Considerations

ClassStrengthsBest For
BarbarianHigh durability, strong damage, easy gearingNew seasonal players and farming
SorcererStrong clearing speed and mobilityFast leveling
RogueExcellent damage output and flexibilityExperienced players
NecromancerStrong minion and control optionsComfortable solo play
SpiritbornUnique mechanics and strong scalingPlayers wanting a different experience

The Barbarian is expected to remain one of the strongest starting options because of its balance between survivability, farming ability, and consistent performance.

A strong first character can help collect resources faster, making your second character much easier to build.

Diablo 4 Season 14 Leveling Preparation

Leveling strategies continue to evolve every season. One major change is that players can focus more on alternative activities instead of following the traditional campaign route.

Before Season 14 begins, players can prepare by testing their leveling route:

  • Create a new character
  • Practice early-game progression
  • Test skill combinations
  • Learn efficient farming locations
  • Understand gear upgrades

A well-prepared player can significantly reduce wasted time after launch.

Example Leveling Preparation Checklist

Preparation TaskBenefit
Test your buildUnderstand early power spikes
Study leveling guidesFaster progression
Prepare class equipment goalsBetter farming efficiency
Join communitiesEasier group leveling
Learn crafting systemsImprove early gear

Many experienced players use the first hours of a season to experiment rather than simply rush. Efficient progression is important, but enjoying the content is what keeps the seasonal experience rewarding.

Gear, Builds, and Diablo 4 Items Strategy

Gear selection becomes one of the most important parts of Season 14 progression. Because builds rely heavily on specific affixes and item combinations, choosing the wrong equipment early can slow down your progress.

Players should focus on:

  • Finding correct legendary aspects
  • Upgrading useful equipment
  • Farming materials efficiently
  • Understanding class-specific requirements

For players looking to optimize their characters faster, Diablo 4 items can help complete builds and improve progression efficiency.

Some players also explore Diablo 4 items for sale options when they want to save time and focus more on endgame activities instead of spending countless hours farming.

Season 14 Community and Group Play

Season launches are often more enjoyable with other players. Group leveling allows players to:

  • Share farming strategies
  • Exchange build ideas
  • Explore new seasonal mechanics
  • Trade useful equipment
  • Complete difficult content together

Active communities usually become especially valuable during the first days of a new season because everyone is discovering the strongest strategies together.

U4GM – Your Gateway to Better Gaming Experiences

For players looking for additional gaming support, U4GM provides a Diablo 4 marketplace experience focused on helping gamers access different game services and resources.

U4GM – Your Gateway to Better Gaming Experiences gives players another option when preparing their seasonal journey, especially for those who want to spend more time enjoying gameplay and less time repeating long farming processes.

Five Things to Do Before Diablo 4 Season 14 Starts

Before the season begins, players can complete these preparation steps:

1. Have Fun and Enjoy the Game

Every season introduces changes. Some updates become favorites, while others may divide the community. The goal is still the same: enjoy playing.

Whether you play for three days, several weeks, or the entire season, the experience is what matters.

2. Prepare Your Character Plan

Decide:

  • Which class you will start
  • Which build you want to test
  • What content you want to focus on

Having a basic plan prevents wasted time after launch.

3. Test Your Build Before Launch

Create a practice character and try your skills. This helps you understand:

  • Damage output
  • Resource management
  • Leveling speed
  • Gear requirements

4. Prepare a Leveling Route

Knowing where to go and what activities to complete can make early progression smoother.

5. Join Seasonal Communities

Finding other players before launch can improve the experience through:

  • Group leveling
  • Trading
  • Theory crafting
  • Build discussions

Diablo 4 Season 14 Launch Preparation Summary

PriorityAction
HighChoose your starting class
HighPlan your build
HighTest leveling routes
MediumOrganize Eternal Realm items
MediumJoin player communities
OptionalPrepare additional resources

Conclusion: Start Fresh and Build Your Season Journey

Diablo 4 Season 14 represents another opportunity for players to experience Sanctuary from the beginning. The seasonal reset may remove previous progression, but it also creates a fresh challenge where every upgrade, discovery, and achievement feels meaningful.Prepare your class, understand the reset system, test your leveling strategy, and enjoy the new journey. The strongest seasonal experiences usually come from combining efficient planning with the freedom to explore and experiment.

Monopoly GO: Free Dice Links for June 11 + Sticker Progress Tips

Monopoly GO: Free Dice Links for June 11 + Sticker Progress Tips

For players of Monopoly GO!, daily Free Dice Links are the fastest way to keep progressing without spending. On June 11, new time-limited rewards are being shared through official channels, giving players extra rolls to push events, complete boards, and unlock sticker packs.

At the same time, progression in sticker events is becoming more competitive, especially for players chasing full albums and rare sets of Monopoly Go Stickers.

June 11 Free Dice Links Overview

Free Dice Links today typically include:

25–100 free dice per link
Event-based bonus drops
Limited-time community reward links

These rewards are usually released in waves and expire quickly, so checking multiple sources throughout the day is essential.

Where to Get Working Links

To stay updated, players should monitor:

Official Monopoly GO social media posts
In-game event and news tab
Community Discord reward drops
Limited promotional collaborations
Why Dice Matter for Stickers

Dice are not just for movement—they directly affect your ability to earn sticker packs. More dice means:

More event milestones
More sticker pack openings
Faster completion of Monopoly Go Stickers collections
Higher chances of rare pulls

For competitive players, this also ties into market behavior where some users choose to buy Monopoly Go Stickers to complete sets faster during high-pressure events.

Pro Strategy Tips
Save dice for sticker boom or high-multiplier events
Focus rolls during milestone-heavy tournaments
Combine free dice with event timing for maximum value
Track daily drops to avoid missing expiring links

June 11 is another active cycle for Monopoly GO players looking to maximize efficiency. Whether you’re grinding naturally or optimizing your sticker collection strategy, Free Dice Links remain the foundation of daily progress—and the core driver behind completing Monopoly Go Stickers sets faster.

Monopoly Go Dice Multiplier Guide: The Smart Way to Gamble Big

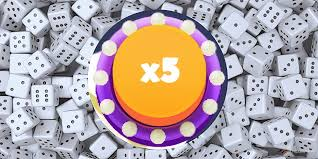
High multipliers are where Monopoly Go gets dangerous, because the same x100 roll that can launch you through an event can also delete your dice stack for landing on trash. The real meta isn’t “always roll bigger”; it’s knowing when the board, the event, and your dice count line up. That matters even more during album grinds, where Monopoly Go Stickers become part of the whole risk-reward loop instead of just a side reward you collect in the background.

What the Dice Multiplier Actually Changes

The Dice Multiplier spends more dice per roll and boosts the payout tied to that roll. Cash, event points, sticker-related progress, partner tokens, railroad rewards, rent hits – if the tile or event reward scales with your roll, the multiplier can make it pop. But it doesn’t magically make bad tiles good. Landing on a dead stretch with x50 feels awful because you didn’t lose one roll; you lost fifty chances to hit something better. That’s the part newer players underestimate. The multiplier is not a buff to your luck. It’s a bet on your next landing spot.

The Best Times to Go High

From what I’ve seen, the cleanest high-multiplier plays happen when you have at least two things working together: a strong event target and a board position that gives you a reasonable shot at it. Railroads are the obvious example because so many events love them, but rent tiles, pickups, Chance, and partner/event tiles can also be worth pushing depending on what’s active. I don’t slam x100 just because a banner event is running. I start thinking about it when I’m close to a milestone reward, have enough dice to survive a miss, and can see several useful tiles within normal roll range.

  • Use x2 to x5 when you’re scouting the board or low on dice.
  • Use x10 to x25 when you’re close to event tiles and still building progress.
  • Use x50 to x100 when a hit would secure a strong milestone or timed reward.
  • Avoid x200-plus unless High Roller is active and you’re playing with a real plan.

Okay, But How Do You Aim Rolls?

You can’t fully control Monopoly Go RNG, but you can stop playing like the dice are pure chaos. Count tiles. Seriously. If a Railroad is 6, 7, or 8 spaces away, that is a much better multiplier spot than hoping for a miracle from halfway around the board. If the nearest target is 11 or 12 spaces away, I usually lower the multiplier and reposition. The goal is not to “guarantee” a hit, because you can’t. The goal is to spend big only when the board is giving you multiple decent outcomes instead of one tiny jackpot tile surrounded by junk.

MultiplierBest UseBiggest Danger
x2-x5Safe grinding, board setup, daily rolls.Slow event progress.
x10-x25Chasing nearby pickups, Railroads, rent, or partner tiles.Can still drain dice if you tilt-roll.
x50-x100Milestone pushes, boosted windows, late-event clutch hits.One bad streak hurts hard.
x200+High Roller bursts with a stacked board position.Dice vanish faster than you expect.

The Mistake Most Players Make

The biggest throw isn’t using a high multiplier. It’s staying on it after the board state has changed. You hit a Railroad, feel cracked, then keep x100 on while you’re miles from the next good tile. That’s how a good run turns into a wipe. Treat your multiplier like a loadout swap. Roll big for the damage window, then drop back down. Another underrated move is stopping after a milestone instead of instantly chasing the next one. Monopoly Go events are designed to make “just one more reward” feel reachable, but the cost curve can turn ugly fast.

My Practical Dice Rules

I like keeping a reserve before I start any serious push. The exact number depends on your account and how active you are, but if your stash is already low, high multipliers become desperation plays rather than strategy. During Partner events, I’m even more careful because wasted rolls don’t just slow you down; they can leave your teammate carrying. During sticker-heavy periods, I’ll also check album needs before burning dice, because chasing random progress when you only need specific sets can feel like grinding loot with the wrong build equipped.

Roll Big, But Don’t Roll Blind

The Dice Multiplier is Monopoly Go’s best casino button, and that’s why it needs discipline. Use low rolls to set the board, medium rolls to farm consistent event value, and high rolls only when the reward is worth the burn. If you’re deep into album season, pairing smart multiplier timing with trades, events, and a trusted Monopoly Go stickers store can keep the grind moving without turning every session into a dice funeral. Big rolls feel amazing, but the real flex is still having dice left after the hype is gone.

Pokémon TCG Pocket Mega Lucario ex Deck Guide for Easy Ranked Battle Wins

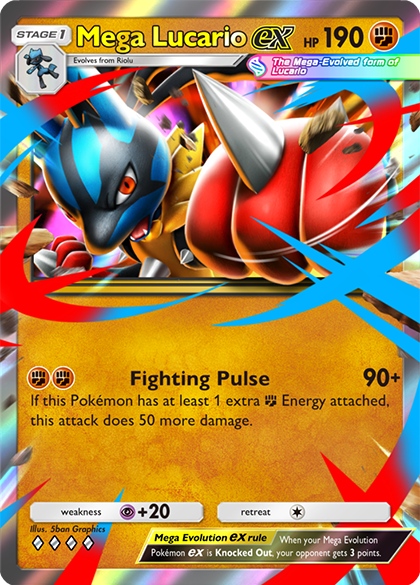
The specific configuration of this deck is listed below, giving Pokémon TCG Pocket players and Pokémon TCG Pocket Accounts owners a complete setup for building and mastering the Mega Lucario ex strategy.

2× Mega Lucario ex
2× Riolu
2× Darkrai
2× Igglybuff
2× Professor’s Research
2× Copycat
1× Korrina
1× Cyrus
1× Sabrina
2× Poké Ball
2× X Speed
1× Arena of Antiquity

Why Mega Lucario ex Feels So Strong Right Now

Mega Lucario ex has quickly become one of the most fun Fighting-type finishers in Pokémon TCG Pocket, mostly because the deck doesn’t rely on mindless aggression. Instead of rushing attacks from the first turn, this build focuses on slowing the game down early, building Energy safely, and setting up one huge sweep later on.

The early turns are all about creating time. Igglybuff is one of the best starters here since Sleepy Lullaby can put the opponent’s Active Pokémon to Sleep without needing any Energy. That small delay can completely change the pace of a match and gives you extra turns to develop your Bench. While the opponent struggles with Sleep, Darkrai adds passive pressure through Bad Dreams, slowly stacking damage without needing to overcommit.

Darkrai also gives the deck another useful control option with Dark Slumber, especially against annoying threats like Oricorio that can otherwise interrupt your setup. During all of this, your main priority is loading Energy onto Riolu before evolving into Mega Lucario ex. If everything lines up correctly, Mega Lucario ex can evolve already prepared to attack immediately, which makes the transition into the midgame feel incredibly smooth.

Mega Lucario ex Takes Over

Once Mega Lucario ex hits the field, the deck starts to snowball fast. Fighting Pulse already deals solid damage on its own, but attaching extra Fighting Energy pushes the attack to 140 damage, enough to threaten most midrange Pokémon in the current format.

What really makes the deck scary, though, is how high the damage ceiling can go with support cards. Korrina adds extra damage against opposing Pokémon ex, while Arena of Antiquity boosts Fighting-type attacks even further. When those bonuses stack together, Mega Lucario ex can suddenly start taking one-hit knockouts on some of the strongest ex cards in the game.

Even Riolu benefits from those boosts during the setup phase, which means your early turns are rarely wasted. Small amounts of chip damage add up quickly and force opponents to play carefully long before Mega Lucario ex becomes active.

Strong Tempo, But Timing Matters

The Supporter lineup keeps the deck consistent without making it overly complicated. Professor’s Research helps cycle through the deck quickly, Copycat can refill your hand after slower turns, and Sabrina gives you opportunities to punish weak Bench setups. Cyrus is also valuable for disrupting awkward board states and forcing targets into the Active Spot when your opponent least wants it.

Of course, the deck is not perfect. Bad opening hands or missing Mega Lucario ex pieces can make the build feel awkward at times, especially against faster decks that pressure early. Energy disruption can also slow your momentum before your main attacker is ready.

Still, the combination of stall tools, steady setup, and explosive damage makes the deck feel rewarding to pilot. It has a very clear game plan, but there’s still enough room for smart decision-making and timing to matter every match.

For players who enjoy controlling tempo, setting up powerful turns, and finishing games with massive attacks, Mega Lucario ex is easily one of the most satisfying decks to play in Pokémon TCG Pocket right now buy Pokemon TCG Pocket Accounts.

Diablo 4 Lord of Hatred Launch Preview Livestream Set for April 23

Diablo 4 is about to hit a pretty big moment, with Blizzard confirming a pre-launch livestream on April 23 at 11:00 a.m. PT. Since it’s only a few days before the Lord of Hatred expansion drops on April 28, this is basically the last big info dump before everything goes live Diablo 4 Items.

From what Blizzard has said so far, this isn’t just a quick preview. They’re planning to go deeper into what’s actually changing, including things like updated class skill trees, the Talisman system, the return of the Horadric Cube, and more endgame content. That makes it feel less like a hype stream and more like a proper breakdown of how the expansion is going to affect builds and progression.

The timing matters too. Being this close to launch, it feels like Blizzard is trying to clear up any confusion and set expectations, especially around endgame and replayability. The expansion itself is expected to push further into the Mephisto storyline, with characters like Lorath showing up again and more focus on corrupted regions of Sanctuary. So it’s not just new mechanics—it sounds like a pretty big story push as well.

They’re also doing a Q&A at the end of the stream, which is honestly one of the more important parts. Diablo players tend to care a lot about balance, build variety, and how rewarding the grind feels, so hearing devs respond directly could help answer some of the bigger concerns before launch.

On top of that, there are Twitch Drops tied to the event. If you watch a stream with drops enabled, you can get the Decaying Corona staff cosmetic after 30 minutes and the Double Trouble sword cosmetic after an hour. The drops are available until April 24 at 10:59 a.m. PT, and you don’t even need to own the game to claim them, which is a nice bonus.

Either way, this feels like one of those streams that actually matters, especially if you’re on the fence about the expansion or just want to know what’s changing before jumping back in diablo 4 gear. If you’re playing Diablo 4 or thinking about coming back, this is probably worth watching. It should give a much clearer idea of whether Lord of Hatred is a real step forward or just more of the same.

Diablo 4 Season 12 Spear of the Heavens Judgement Paladin Build Guide

In Diablo 4 Season 12, the Spear of the Heavens Judgement Paladin has become one of the more fun and effective ranged builds to play. It hits hard, sustains well, and doesn’t require a super complicated rotation to get good results. The whole setup revolves around using Spear of the Heavens together with Judgement mechanics, then boosting everything with the right Uniques and Aspects. When it’s working properly, you’re basically chaining big AoE hits while staying surprisingly durable Diablo 4 Items.

Most of your damage comes from how often you can trigger Judgement and reset your cooldowns. You go into Arbiter of Justice, build up buffs like Aspect of Celestial Strife and Aspect of Ascension, then start dropping Spear of the Heavens into packs. At the same time, you’re applying Judgement through skills like Reach of the Law and Holy Light Aura. Once those marks start detonating—especially if you speed it up with Blessed Hammer—they quickly reset your spear cooldown, letting you keep casting again and again. That’s what makes the build feel so explosive, especially in dense dungeons or higher-tier content.

Gear-wise, you’re mostly looking to boost Judgement uptime, crit chance, and Holy damage. Some Uniques stand out more than others. Judicant’s Glaivehelm is a big one because it adds extra spears that also carry Judgement, which means more damage without extra effort. Items like Shroud of False Death, Heir of Perdition, and Griswold’s Opus also fit well, especially since the build naturally stacks crit. Seal of the Second Trumpet is another strong pickup if you can get it, since it really amps up the damage when multiple Judgements go off in quick succession.

When it comes to Aspects and board setup, the goal is to keep your buffs active as much as possible and push your Holy damage higher. A common path is to move from the Starter board into Castle, then Relentless, Preacher, and Beacon, picking up the important bonuses along the way. Aspects like Golden Hour and Judicator are usually prioritized to boost your damage during Arbiter uptime. You’ll also want a couple of defensive options mixed in so you’re not too fragile when pulling bigger groups or fighting bosses.

The actual playstyle is pretty easy to get used to. You keep Arbiter of Justice active, drop your spears, and move through enemies while applying Judgement with your aura and abilities. Then you trigger those Judgements with Blessed Hammer to speed things up. As everything starts exploding, your cooldowns drop fast, and you just repeat the loop. It works best if you stay mobile and keep the flow going instead of standing in one place too long. Support skills like Rally, Defiance Aura, and Fanaticism help smooth things out by boosting cooldowns, survivability, and damage reduction.

One of the reasons this build works so well in Season 12 is how flexible it is. The longer fights go, the stronger it feels thanks to stacking Aspects, which makes it great for bosses and high-level Nightmare Dungeons. At the same time, it clears regular content quickly because of how much AoE damage it puts out. You don’t really need to change much between different activities, which is always a plus.

If you’re just getting into it, it’s worth following a basic guide at first so you can get the key skills and gear in place diablo 4 s12 items. After that, you can start adjusting stats and rolls as you get better drops. The build isn’t overly demanding once you understand how the Judgement loop works, and it rewards steady, consistent play more than perfect timing. With the right setup, it handles both boss fights and large packs really well, which is why it’s considered one of the stronger Paladin options this season.

Diablo 4 Level Cap Increase to 70 Reshapes Builds

The upcoming Lord of Hatred expansion for Diablo 4 isn’t just adding a new class and region. One of the biggest changes is the level cap going from 60 to 70, and that alone could shake up how progression feels Diablo 4 Items. Ten levels doesn’t sound massive on paper, but because they sit right before Paragon, they change the pacing of when your character actually feels “finished.”

Right now, most builds don’t really click until late leveling or early Paragon. You spend a lot of time in that awkward phase where your idea is there, but it’s missing key passives, interactions, or scaling. Those extra ten levels mean more skill points before Paragon even starts. That gives builds more room to breathe. Instead of racing to 60 and immediately relying on boards and glyphs to feel strong, you’ll have a longer stretch where your core setup can come together naturally.

A big part of this ties into the skill tree adjustments coming with Lord of Hatred. Some effects that used to live mainly on gear are being shifted into the tree, while certain passives are getting trimmed or reorganized. In practice, that should mean less “my build doesn’t work until I find this one specific drop.” If more of your power comes from skill points earned on the way to 70, it becomes easier to experiment. You can try hybrid ideas or pivot mid-leveling without feeling completely bricked by bad luck.

Item progression will probably feel different too. If characters enter Paragon at 70 instead of 60, their base power will be higher before boards even come into play. That could smooth out early endgame farming. Instead of feeling weak in your first Nightmare Dungeons or Pit pushes, you might already have a solid foundation from the extended leveling phase. Of course, loot scaling will need to keep up. If item power and drop pacing don’t adjust, gearing could feel compressed or awkward. But if it’s tuned well, builds may feel viable earlier instead of only after heavy Paragon investment.

Pushing Paragon back to 70 also stretches out the overall seasonal climb. Right now, experienced players can hit cap extremely fast, especially with optimized routes. Adding ten levels slows that down just enough to make the journey matter again. For casual players, that’s probably a good thing. It means more time enjoying story content and steady growth instead of feeling rushed into pure endgame grind mode. For alt characters, those levels between 61 and 70 might feel like meaningful power spikes rather than filler.

Not everyone loves the idea, though. Some high-end players worry it delays access to Paragon boards and glyph scaling, especially for builds that rely heavily on those multipliers. If your entire setup hinges on specific Paragon nodes, you’ll need to rethink how it functions in that 60–70 window. There’s also the leaderboard angle. Players who live for early seasonal pushes might see this as an extra hurdle before they can truly optimize.

Class impact will likely vary a lot. Some builds that struggle early because they split points between multiple skill clusters could benefit the most from the added flexibility. Hybrid setups, in particular, might finally feel smoother during leveling instead of underpowered until Paragon fixes everything. Meanwhile, more straightforward, single-path builds may just gain extra polish and consistency diablo 4 gear.

The level cap increase feels less about raw power creep and more about pacing. It stretches the journey so that your character feels more complete before Paragon even begins. If the skill tree changes land well, the result could be more freedom to experiment and fewer builds that depend entirely on one lucky drop. As Lord of Hatred gets closer, the real picture will come from testing and community theorycrafting, but on paper, level 70 has the potential to make progression feel more natural instead of front-loaded into the endgame.

Diablo 4 Lord of Hatred Leaks Reveal Runeworks System

The reveal of Diablo 4’s Lord of Hatred expansion has already reshaped how many players think about the game’s future, and one of the most talked-about ideas coming out of early footage and leaks is the return of a rune-based system that the community has started calling “Runeworks.” While Blizzard has been open about major features like the Paladin, the Skovos Isles, and sweeping endgame changes, smaller details tucked into trailers and datamined files have sparked speculation that runes and Runewords will play a much bigger role than first expected. For a lot of players, especially longtime fans of Diablo 2, it feels like Diablo 4 may finally be adding a deeper layer of item identity without simply copying the past Diablo 4 Items.

Blizzard has confirmed that runes and Runewords are part of Vessel of Hatred, but the way they work is very different from the classic system. Instead of slotting a specific sequence of runes into an item to create a fixed outcome, Diablo 4 uses two types of runes that interact with each other. Runes of Ritual generate an Offering resource when certain conditions are met, while Runes of Invocation consume that Offering to trigger powerful effects. Players quickly latched onto the term “Runeworks” to describe the whole system, mostly because it feels less like a throwback gimmick and more like a new framework built around Diablo 4’s faster combat and tighter stat design.

Trailer breakdowns and leaks have only added to the excitement. Some sharp-eyed viewers noticed brief moments where runes appear to swirl around weapons, often alongside imagery of the Horadric Cube. That has led to speculation that the Cube will be more than a simple crafting tool and could become central to assembling, modifying, or re-rolling runic effects. When you combine that with Blizzard’s promises of expanded crafting and more control over endgame progression, it starts to look like runes could sit right between loot hunting and long-term character planning, rather than being just another source of passive bonuses.

What’s been pieced together so far suggests a system built around choice and risk. Ritual runes trigger Offering through specific actions, like using certain skills, hitting particular enemy types, or leaning into more dangerous play patterns. Invocation runes then turn that Offering into tangible power, whether that’s a burst of damage, a defensive effect, or something more exotic, including abilities that blur class boundaries. Because tougher Ritual conditions generate more Offering, players are already theorycrafting setups that intentionally push risk higher in exchange for much stronger payoffs.

Datamining and early previews also hint that Runeworks won’t be confined to a single piece of gear. Instead, runes may appear across several important slots, including weapons and major armor pieces, thanks to new socket options. That opens the door to layering multiple runic effects across a build, each with its own trigger and reward. It also means more complexity. Rather than slapping on a bonus and forgetting about it, players will need to think about timing, positioning, and how their skills interact with rune conditions if they want everything to line up during combat.

From a design standpoint, Runeworks looks like Blizzard’s attempt to address a common complaint about Diablo 4’s loot: that too much power was locked behind a small number of must-have uniques. By tying big effects to conditional systems instead of raw stats, the developers can add meaningful power without completely overshadowing existing legendaries and uniques. Early community reactions have been cautiously positive, with many players excited about the possibility of finding unexpected rune combinations that open up new playstyles rather than just chasing the same best-in-slot items every season.

When you look at Runeworks alongside the other changes coming with Lord of Hatred—reworked skills, better loot tools, deeper crafting, and a more demanding endgame—it feels like part of a broader shift toward giving players more control over how their characters grow. With a new region to explore and harder content on the horizon, having a flexible system that rewards experimentation could be exactly what Diablo 4 needs diablo 4 gear for sale. If even some of the current leaks and interpretations turn out to be accurate, Runeworks might end up being the feature that finally gives Diablo 4 its own long-term identity, one built around choice, creativity, and the satisfaction of making a build truly your own.

Arc Raiders Battle Pass 2 Reveals All Goalie Raider Deck Rewards

Arc Raiders’ Cold Snap update brought more than just icy weather and tougher conditions—it also introduced the Goalie Raider Deck, which functions as Battle Pass 2 in a way that feels refreshingly player-friendly. Instead of a timed, paid track, this is a free and permanent reward board inspired by hockey culture, packed with cosmetics and practical gear for dangerous raids against the ARC threat. Players unlock rewards by spending Cred they earn in matches, moving through pages at their own pace with no pressure to grind before a deadline ARC Raiders Coins.

Cred is earned naturally just by playing raids and completing Feats, which are small objectives tied to normal gameplay. You can complete up to three Feats per match, with goals like taking down certain ARC enemies, dealing damage with specific weapons, or extracting with loot. These reset every day, giving steady progress without forcing marathon sessions. There’s a soft cap at 800 Cred to discourage hoarding, but the bonus Cred from the first few daily Feats makes it forgiving even if you only play a bit each day. Because each page only unlocks after you spend a set amount of Cred, players are encouraged to choose carefully instead of buying everything.

The early rewards ease you in with personality-focused items. On the first page, players can grab the Goalie Mask, hockey-themed face paint, and a stick emote, all for relatively low Cred costs. These unlocks don’t feel like filler, especially since they’re paired with small utility packs that can actually help in raids. The mask in particular has been a favorite thanks to its detailed look, catching light nicely in Speranza’s harsh environments and standing out during screenshots or tense encounters with ARC units.

As you move deeper into the deck, the focus shifts toward survival tools. Later pages introduce packs filled with tactical gear like Lure Grenades, Wolfpacks, flame sprays, traps, and bandages, making them especially appealing for aggressive squads or players pushing contested areas. The balance between cosmetics and useful items feels intentional, so even players who don’t care much about outfits still get value. Emotes and visual flair are sprinkled in just enough to keep things fun without overshadowing the practical rewards.

Midway through the deck, the hockey theme really comes together. Outfit color variants inspired by goalie pads mix with defensive gear like door blockers, mines, and noisemakers, which work well in Snowfall conditions where visibility is limited. Stealth-focused packs with tools like the Snap Hook and smoke grenades also shine here, supporting slower, more tactical playstyles. These pages feel designed for players who enjoy holding positions or setting traps while ARC enemies close in.

The later pages lean into longer-term progression. Medical-focused packs prepare players for extended raids, while key-focused rewards open access to high-value loot locations for those willing to take risks. Cred costs rise, but the rewards match the investment, making the deck feel more like a long-term vault than something you rush through. Smaller pages near the end often include Raider Tokens or signature items tied to the Goalie theme, giving a satisfying finish without locking anything essential behind excessive grinding.

What really makes the Goalie Raider Deck stand out is its permanence. Knowing the rewards aren’t going anywhere changes how progression feels, especially in a high-stress extraction shooter. Players can log in, complete a few Feats, and slowly build toward what they want, whether that’s a full hockey-inspired look or a stash of useful raid tools ARC Raiders Coins cheap. It’s a system that respects time while still rewarding commitment, and it fits neatly into Arc Raiders’ evolving identity.

What Are the Best Judgment Tips in Diablo IV

Once you’ve hit the Diablo IV endgame, you’ll bump into Judgment and probably think, “Okay… what am I meant to do with this.” I felt that way too, and I ended up digging into it while tweaking builds and comparing clears.

If you’re also gearing, trading, or just trying to smooth out the grind, a lot of players keep an eye on U4GM while they plan upgrades, because Judgment setups can be weirdly gear-sensitive. At face value, Judgment is a mark with a little holy orb over the target, and if you ignore it, it pops after about three seconds for a chunk of weapon damage. That baseline detonation works, but it’s not where the mechanic starts paying rent.

How Detonating Actually Feels in Real Runs

The moment you stop waiting for the timer, Judgment gets way more useful. You mark, then you choose when it blows. That’s the whole vibe. With Udicator’s Oath, you can trigger the pop early off core skills, so the mark turns from “passive extra damage” into something you’re actively steering. In practice, it’s the difference between tagging a tough elite and watching it slowly tick down, versus snapping the detonation right as a pack stacks up. You’ll also notice the pacing change: fights feel less like you’re babysitting a debuff and more like you’re setting up little bursts on demand.

Two Playstyles People Keep Mixing Up

Most players end up in one of two lanes. First is Active Judgment: you apply the mark, then detonate it on purpose, usually while you’re already in your damage loop. It’s cleaner for leveling, Helltides, and general farming because you’re in control and you’re moving fast. Second is Passive Judgment: you mark and let the timer do the work. That can make sense in high-pressure pushing when your attention is split, especially if your rotation is already tight and you can’t afford extra inputs. But if your build doesn’t have the cooldowns and rhythm to support it, Passive just feels sluggish, like you’re always waiting for damage that’s slightly late.

Scaling and the Stuff That Quietly Matters

If you want Judgment to hit like it’s supposed to, you can’t treat the scaling as optional. Aspect of Golden Hour is a big deal because it amps your Judgment damage and helps marks chain through nearby targets, which is where the screen-wide clear starts showing up. Then you layer Aspect of Dejudicator to push detonation size and punch, so you’re not wasting pops on half a pack. Also, don’t sleep on the boring gear checks. Shields matter more than people admit, and a strong Strength roll can be the difference between “nice” and “why did everything just vanish.” In groups, one more gotcha: credit sticks to whoever applied Judgment, not whoever triggered the blast, so coordinate if you care about who’s getting the payoff.

Making Judgment Worth Building Around

The best way to think about Judgment is that it’s not a bonus, it’s a routine. You mark on entry, you herd enemies into a spot that makes sense, then you detonate when it’s going to delete the most bodies. Once you play it that way, the mechanic stops feeling mysterious and starts feeling like a tool you can lean on, even when content gets nasty. If you’re at the point where your setup is almost there but not quite clicking, it’s usually a gear breakpoint problem, and browsing d4 gear for sale can help you spot what slots other Judgment builds are prioritising before you sink more hours into trial and error.